 Pin it
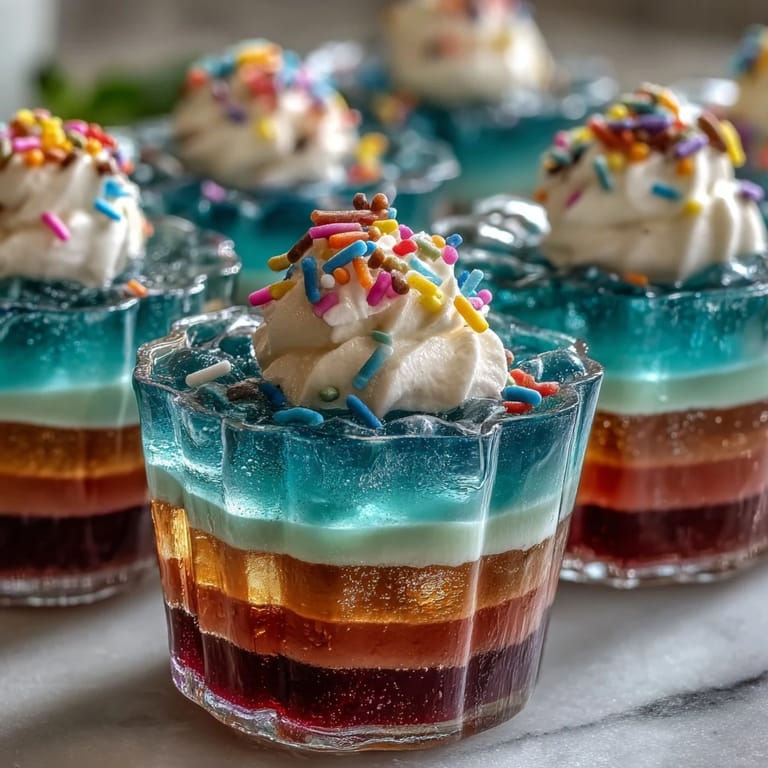
 The first time I made rainbow Jello cups, the kitchen seemed to transform with each bowl of liquid color. I didn’t expect my curiosity to turn into such a playful process: watching the layers set felt almost magical. The counters were crowded with cups and bowls, and the air was filled with fruity scents. At one point, I misread the flavor order, which only added to the laughter. These cups quickly became my secret weapon for gatherings where I wanted something both simple and spectacular.
One summer, my niece and nephew came over, and we spent the afternoon making these Jello cups together. They opted for their own color order, which meant extra blue and a missing green in some cups. We giggled at our uneven layers and the stray sprinkles on the floor, but nothing tasted sweeter than seeing their faces light up when it was finally time to eat.
Ingredients
- Strawberry Jello (red): This is the show-stopping top layer—make sure to dissolve it fully for crystal-clear results.
- Orange Jello: Adds a sunny citrus note; I learned stirring gently minimizes bubbles that can cloud the layers.
- Lemon Jello (yellow): Its tartness cuts through the sweetness and gives the visual 'pop' of the rainbow.
- Lime Jello (green): The color seems bold once layered, and chilling long enough prevents blending.
- Berry blue Jello: This one can be tricky; set times matter or it’ll ripple into the next layer.
- Grape Jello (purple): For the foundational base, the chill is crucial so it doesn’t mix with blue.
- Boiling water: Ensures rapid dissolving; always measure so layers aren’t too thick.
- Cold water: Cool down each mix for a perfect set—don’t skip the cold water or the layers stay soft.
- Whipped cream or topping: The creamy finish; pipe or spoon gently to preserve the pristine rainbow.
- Rainbow sprinkles (optional): A playful touch that’s always requested by the younger crowd.
Tired of Takeout? 🥡
Get 10 meals you can make faster than delivery arrives. Seriously.
One email. No spam. Unsubscribe anytime.
Instructions
- Start with purple:
- Mix a box of grape Jello with boiling water until dissolved, then stir in cold water. Divide evenly among eight cups—about two tablespoons in each—and refrigerate until firm.
- Layer blue:
- Prepare berry blue Jello just as before, pour gently over the purple set layer, and chill again for at least half an hour.
- Add green:
- Repeat the process using lime Jello, making sure each cup gets the same amount so the stripes stay neat.
- Continue with yellow:
- Mix lemon Jello and layer it after green, then let it set—yellow’s brightness always feels like a tiny sunbeam in the kitchen.
- Follow with orange:
- Orange Jello gives a sunny color; pour with care to avoid splashes and allow it to solidify fully.
- Finish with red:
- Strawberry Jello tops it off—let the set time truly finish so the creamy topping won’t sink.
- Topping time:
- Add whipped cream and sprinkles over fully chilled cups for the final flourish, then serve and share the smiles.
 Pin it
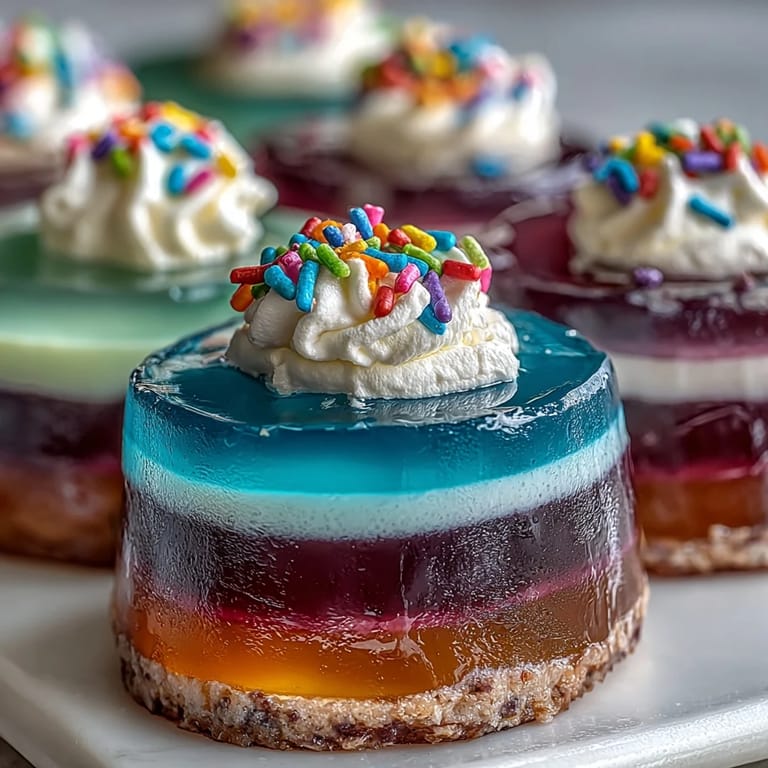
 I’ll never forget the birthday party where these rainbow Jello cups practically stole the show. Several kids asked if I could pack extras for the ride home, and even the grown-ups found themselves marveling at the glass-like stripes, one spoonful at a time.
Rainbow Layer Perfection
Every time I pour a new color, I notice the kitchen quiets down—there’s a kind of anticipation, knowing the full effect won’t be revealed until hours later. If you let each layer set fully, the lines stay crisp and each spoonful tastes distinct.
Making It With Kids
Letting kids help with pouring and decorating always leads to joyful chaos, and honestly, the occasional spill is just part of the fun. Don’t worry about perfect lines; crooked layers become part of the story.
Party Prep Secrets
Prepping all the Jello boxes in advance meant less scrambling and more time to chat with guests. If you make these the day before, cover the cups and stash them in the fridge away from strong-smelling foods.
- Whipped cream can be piped just before serving for best texture.
- Try making mini cups for younger kids or big gatherings—they’re easier to handle.
- Always use fresh boiling water to keep the colors vibrant.
 Pin it
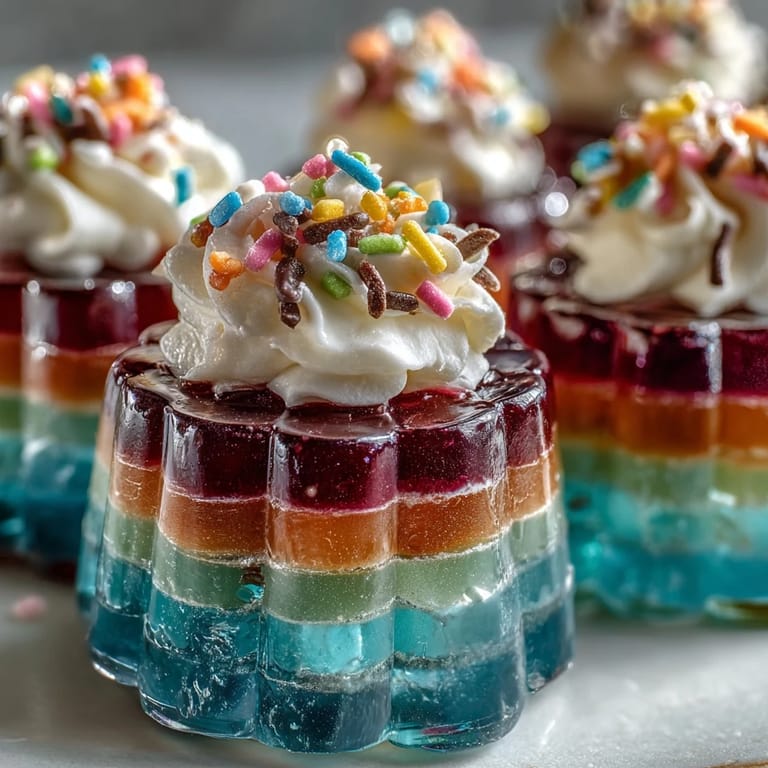
 There’s something contagious about the bright colors and sweet flavors of these rainbow Jello cups. Watching faces light up with each spoonful always reminds me just how simple joys can be shared.
Recipe FAQ
- → How do I get distinct Jello layers?
Allow each Jello layer to completely set in the refrigerator before adding the next, typically 30–40 minutes.
- → Can I substitute flavors and colors?
Yes, you can choose any Jello flavors or colors to match your occasion or preferences.
- → What if I want a dairy-free option?
Use coconut whipped cream or any non-dairy whipped topping for a dairy-free version.
- → How far in advance can I make these cups?
Prepare them up to a day ahead, keeping them chilled until ready to serve for best texture and appearance.
- → Are there sugar-free options?
Use sugar-free versions of Jello and whipped topping for a lighter, lower-sugar dessert.
- → What tools do I need for preparation?
Prepare with clear cups, mixing bowls, measuring cups, and a refrigerator for chilling the layers.