 Pin it
 My sister brought home a box of Nutter Butters one afternoon, and I was halfway through the sleeve before I thought: what if I turned this into cheesecake? The idea sounded wild at first, but peanut butter and cream cheese have always been a dream team in my kitchen. I grabbed my springform pan that same evening and got to work. The scent of those cookies baking into a crust made the whole house smell like a county fair. That first slice, topped with billowy whipped cream, convinced me I'd stumbled onto something worth repeating.
I made this for a summer potluck once, and my friend Jake, who claims he doesnt like cheesecake, ate two slices before admitting he was wrong about the whole category. There was something about the peanut butter that made it feel less formal, more like a nostalgic treat than a fancy dessert. We sat on the porch with paper plates, and someone asked if I'd sell them by the slice. I didnt, but I did write down the recipe on a napkin that night. It became the dessert I brought everywhere after that.
Ingredients
- Nutter Butter cookies: These become the soul of the crust, bringing peanut flavor and structure without needing extra sugar or spice.
- Unsalted butter: Melted butter binds the cookie crumbs and adds richness, letting you control the salt level in the crust.
- Cream cheese: Softened to room temperature, it blends into a silky filling without lumps or air pockets.
- Granulated sugar: Sweetens the filling just enough to balance the tang of the cream cheese and the richness of peanut butter.
- Vanilla extract: A teaspoon goes a long way in rounding out the flavors and adding warmth.
- Eggs: They give the cheesecake structure and a tender, custard-like texture when baked gently.
- Creamy peanut butter: This is where the magic happens, swirling into the batter and delivering that unmistakable nutty depth.
- Heavy whipping cream: Whipped with powdered sugar, it crowns each slice with a cloud of sweetness.
- Powdered sugar: Sweetens and stabilizes the whipped cream without adding grit.
- Chopped peanuts: Optional but highly recommended for a crunchy contrast on top.
- Extra Nutter Butter cookies: Perfect for garnishing and giving guests a hint of whats hiding inside.
Tired of Takeout? 🥡
Get 10 meals you can make faster than delivery arrives. Seriously.
One email. No spam. Unsubscribe anytime.
Instructions
- Prep Your Pan:
- Preheat your oven to 325°F and grease a 9-inch springform pan, then line the bottom with parchment paper. This step prevents sticking and makes release so much easier later.
- Build the Crust:
- Crush the Nutter Butters until they resemble coarse sand, then stir in melted butter until the mixture holds together when pressed. Pack it firmly into the pan bottom using the back of a measuring cup, then bake for 10 minutes and let it cool.
- Beat the Base:
- In a large bowl, beat softened cream cheese and granulated sugar with an electric mixer on medium speed until the mixture is smooth and fluffy, about 2 to 3 minutes. Scrape down the sides as needed to ensure even mixing.
- Add the Peanut Butter:
- Mix in the vanilla extract and creamy peanut butter until fully incorporated and the batter looks uniform. The peanut butter should swirl in without streaks.
- Fold in the Eggs:
- Add eggs one at a time on low speed, mixing just until each one disappears into the batter. Over-mixing introduces air bubbles that can cause cracks during baking.
- Pour and Smooth:
- Pour the filling over the cooled crust and use a spatula to smooth the top into an even layer. Tap the pan gently on the counter to release any trapped air.
- Bake Low and Slow:
- Bake for 50 to 60 minutes, until the edges are set but the center still has a slight jiggle when you shake the pan. The residual heat will finish cooking the middle as it cools.
- Cool in the Oven:
- Turn off the heat and crack the oven door open, letting the cheesecake cool inside for an hour. This gradual temperature drop helps prevent cracks on the surface.
- Chill Completely:
- Remove the cheesecake from the oven and refrigerate for at least 4 hours, or overnight if you can wait. Chilling firms up the texture and deepens the flavor.
- Whip the Topping:
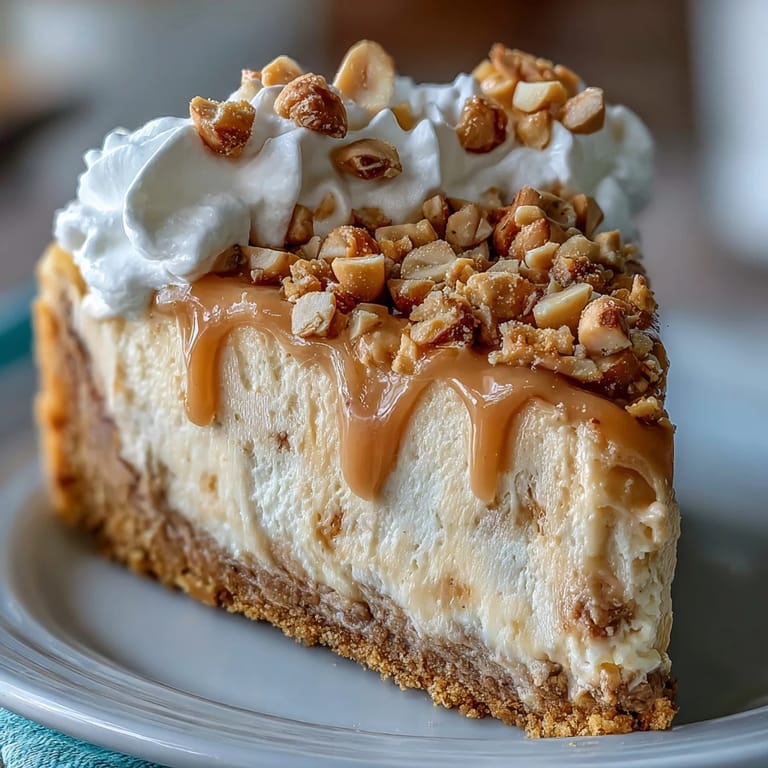
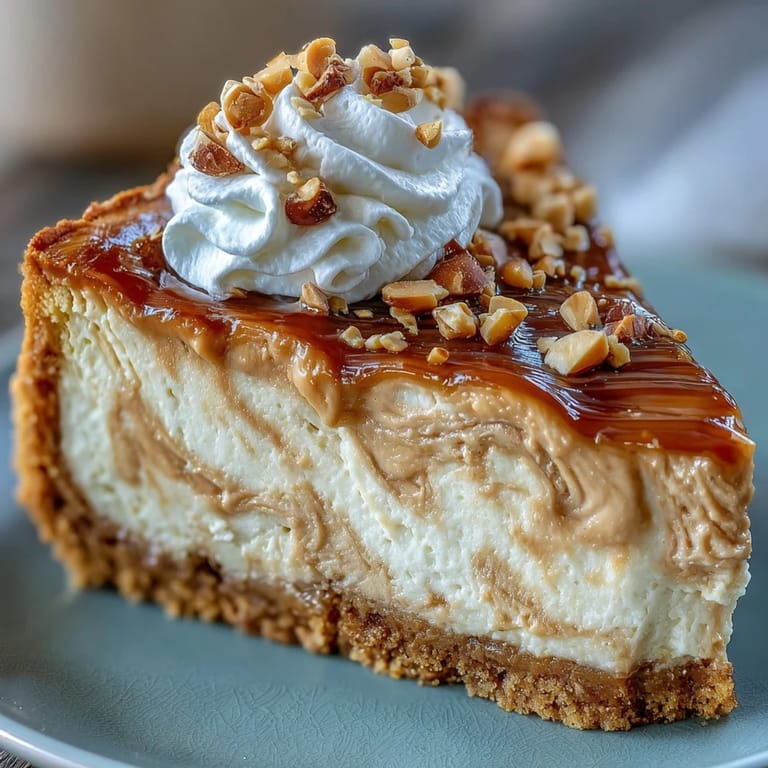
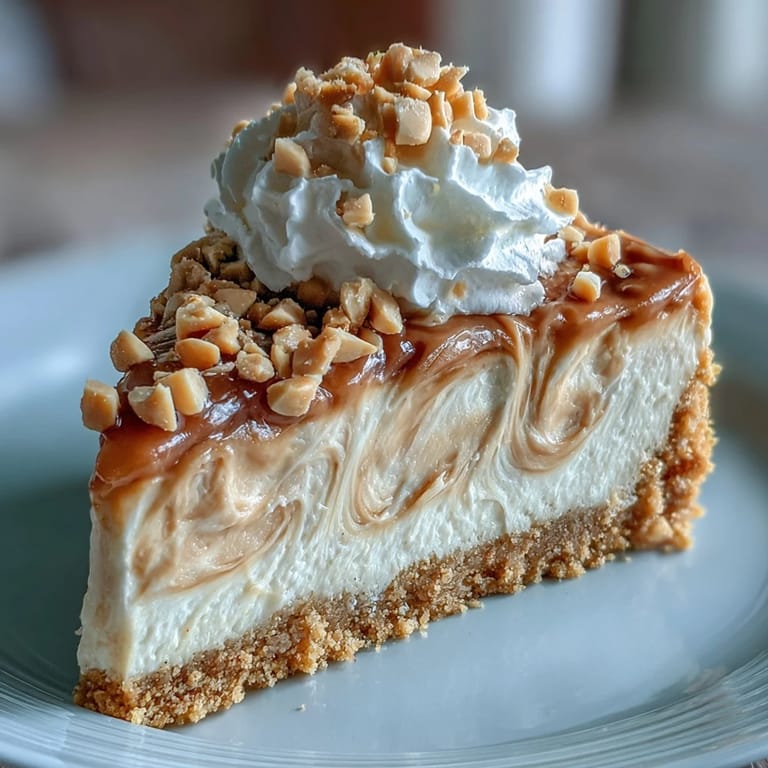
- Beat heavy cream with powdered sugar until stiff peaks form, then spread it over the chilled cheesecake. The whipped cream adds a light, sweet contrast to the dense filling.
- Garnish and Serve:
- Sprinkle chopped peanuts and arrange extra Nutter Butter cookies on top, then slice with a hot, clean knife. Serve chilled and watch it disappear.
 Pin it
 One evening, my neighbor knocked on the door and asked if I had any dessert to spare because her book club was coming over in twenty minutes. I handed her half this cheesecake, still chilled in the pan, and she returned it the next day with a thank-you card signed by six people. She said it sparked a fifteen-minute conversation about childhood lunchbox snacks. That was the moment I realized food doesnt just fill you up, it fills in the gaps between people.
Storing and Making Ahead
This cheesecake actually improves after a night in the fridge, the flavors meld and the texture becomes even more velvety. I usually make it the day before I need it, wrapping the whole pan tightly in plastic wrap once its fully chilled. It keeps beautifully for up to four days in the refrigerator, though it rarely lasts that long in my house. If you want to freeze it, do so before adding the whipped cream topping, wrap it well, and it will hold for up to two months.
Customizing Your Cheesecake
Ive experimented with drizzling melted chocolate or caramel sauce over each slice, and both additions felt like natural extensions of the peanut butter theme. If youre feeling adventurous, try folding mini chocolate chips or chopped peanut butter cups into the batter before baking. You can also swap the Nutter Butters for another peanut butter cookie if thats whats in your pantry. The base recipe is forgiving and welcomes improvisation, so dont be afraid to make it your own.
Serving Suggestions
I love serving this cheesecake straight from the fridge on a hot day, when something cold and creamy feels like the only reasonable option. It pairs beautifully with a strong cup of coffee or a glass of cold milk, both of which cut through the richness without competing with the peanut butter. For a party, I sometimes set out small bowls of chocolate chips, crushed pretzels, and extra whipped cream so guests can build their own toppings.
- Slice it with a hot knife for clean edges and a professional look.
- Serve it on chilled plates to keep the whipped cream from melting too fast.
- Pair it with a scoop of vanilla ice cream if you want to push it over the top.
 Pin it
 This cheesecake has become my go-to whenever I want to surprise someone with something that tastes like effort but doesnt demand perfection. Its rich, nostalgic, and always gets people talking. I hope it lands on your table soon and brings you the same kind of happy, peanut-buttery comfort it brought me.
Recipe FAQ
- → Can I make this ahead of time?
Yes, this cheesecake actually improves when made a day ahead. The flavors have time to meld together, creating a deeper peanut butter taste. Store in the refrigerator for up to 5 days, and add the whipped cream just before serving for the freshest presentation.
- → Why did my cheesecake crack?
Cracking typically occurs from over-mixing the eggs or cooling too quickly. Mix eggs just until combined and avoid opening the oven door during baking. The slow cooling method in the instructions helps prevent cracking, or you can use a water bath for extra insurance.
- → Can I use natural peanut butter?
Natural peanut butter can work, but it may affect the texture since the oils can separate. For the best results, use creamy commercial peanut butter with stabilizers. If using natural, stir it thoroughly and consider reducing other liquids slightly in the filling.
- → Do I need a springform pan?
A springform pan is highly recommended because it allows you to release the cheesecake without damaging the crust or sides. If you don't have one, a regular 9-inch cake pan lined with parchment paper with overhanging edges can work, though removing it will require more care.
- → Can I freeze this cheesecake?
Absolutely! Freeze the cheesecake without whipped cream for up to 3 months. Wrap it tightly in plastic wrap and foil, then thaw in the refrigerator overnight. Add fresh whipped cream and garnishes after thawing for the best texture and appearance.
- → What's the best way to get clean slices?
For perfect slices, use a sharp knife dipped in hot water and wiped clean between each cut. You can also run the knife under warm water or use a thin piece of dental floss held taut. Chilling the cheesecake thoroughly before slicing is essential for clean edges.